
The CLM Book - Optimized Component Lifecycle Management with Sonatype CLM
License threat groups, are simply groups of licenses, broken into categories of severity for the various types of licenses. They can help you to achieve your goals related to enforcing the usage of components with licensing that matches the scope of your application.
Their primary purpose is to serve as the data points for the License section of the application composition report. Moreover, they are a way to group risk, associated with licensing. By default, there are four license threat groups included with Sonatype CLM:
- Copyleft
- Strong copyleft licenses go a step further from weak copyleft licenses and mandate that any distributed software that links or otherwise incorporates such code be licensed under compatible licenses, which are a subset of the available open-source licenses. As a result, these licenses have been called viral.
- Non Standard
- Something out of the ordinary (e.g. If we ever meet, give me a beer license).
- Weak Copyleft
- Free software licenses that mandate that source code that descended from software licensed under them, will remain under the same, weak copyleft, license. However, one can link to weak copyleft code from code under a different license (including non-open-source code), or otherwise incorporate it in a larger software. Otherwise, weak copyleft licenses allow free distribution, use , selling copies of the code or the binaries (as long as the binaries are accompanied by the (unobfuscated) source code), etc.
- Liberal
- These licenses allow you to do almost anything conceivable with the program and its source code, including distributing then, selling them, using the resultant software for any purpose, incorporating into other software, or even converting copies to different licenses, including that of non-free (so-called “proprietary”) software.
|
|
|
|
Consult with your legal department for EXACT definitions. Information provided above is from the following reference. |
An important aspect of license threat groups is that each one also has a threat level, just like policy (from zero signifying no threat all the way up to 10). Unless you have specific legal recommendation / council, the default license threat groups will suffice, especially in the beginning.
If you desire, you can edit these default groups, or create entirely new ones. When creating license threat groups, keep in mind that they will be inherited from the organization to all associated applications.
There are two key ways to create a license threat group:
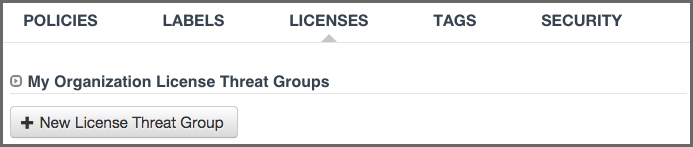
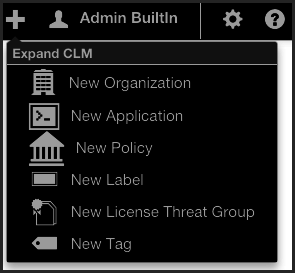
There is really no difference here, as both require that you have the organization or application open at the time of creation. The one advantage with using the Global Create button is that you can create no matter which tab of the currently selected organization or application you are in, whereas you will need to be on the License tab otherwise.
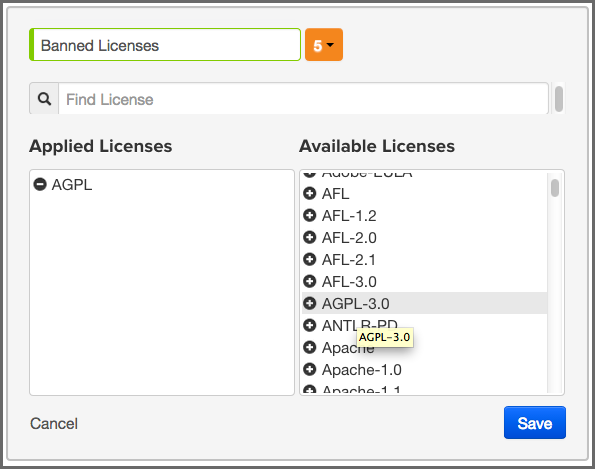
The following information needs to be completed before a license threat group can be saved.
- Name
- This is the name for your license threat group. When creating or editing the name of a license threat group, remember to use something that is easily identifiable. If you’re following along with our example in the next section, use Banned Licenses.
- Threat Level
- This is the level of threat this group of licenses should represent.
- Applied and Available Licenses
- Adding licenses to the license threat group is not an actual requirement, but there really isn’t much use for simply creating a group as a placeholder. So this is treated as a required field.
On the left are licenses that are included in the license threat group. Click on a license to remove it.
+ On the right are the licenses that can be added the group. Click on a license to add it.
When everything is done your screen should look like Figure 7.17, “Creating a Label Condition” and you can click the Save button to finish.
- Editing
- To make changes to a license threat group, click on the Edit icon (shaped like a pencil).
- Deleting
- To delete a license threat group, just click on the Delete icon (shaped like a trash can) next to the label name.
A few things to remember:
- A set of four default license threat groups are provided.
- Applications inherit license threat groups from their organization.
- An organization’s license threat groups can be seen by any of its applications, the reverse is not true.
- License threat groups can only be edited (or deleted) at the level they were created.
In the example below a new condition for the license threat group, Banned Licenses, will be added to an new policy.
In our instructions, we’ve made an assumption that you understand how to create a policy.
- Create a new policy.
- In the Constraints area click on the Expand/Collapse icon (shaped like a right-facing triangle). It’s next to the Constraint Name and should display Unnamed Constraint.
- Once the constraint is expanded, click the Constraint Name field and enter Banned License.
- Now, in the Conditions area, change Age in the first drop down menu to License Threat Group.
- Next, in the second drop down menu choose is for the operator.
- Finally, in the third drop down menu, find and select the Banned License label you just created.
- Click the Save button to finish.

In most cases, a license is associated with one or more License Threat Groups. However, it is possible for a license to have no association with any License Threat Group. You can create a Policy to detect when a component has a license that is not assigned to any License Threat Group.
In the example below a new condition for detecting components with licenses not assigned to any License Threat Group will be added to a new policy.
In our instructions, we’ve made an assumption that you understand how to create a policy.
- Create a new policy.
- In the Constraints area click on the Expand/Collapse icon (shaped like a right-facing triangle). It’s next to the Constraint Name and should display Unnamed Constraint.
- Once the constraint is expanded, click the Constraint Name field and enter Unassigned LTG.
- Now, in the Conditions area, change Age in the first drop down menu to License Threat Group.
- Next, in the second drop down menu choose is for the operator.
- Finally, in the third drop down menu, find and select [unassigned].
- Click the Save button to finish.

A violation of the policy above can be remediated simply by assigning the license involved to a License Threat Group.
To remediate a specific component, use the Component Information Panel (CIP) License tab to set the license Status to Selected or Overridden, and then select a license that is associated with at least one License Threat Group. Managing component licenses is discussed further in the editing License Status and Information section of the Application Composition Report chapter.
In any given business, you could have hundreds, maybe even thousands of applications. Even if you are just getting started, it’s likely you have a handful of applications. However, as unique as applications can be, they tend to share some similarities.
For example, you might have applications that process or store sensitive information, maybe even personally identifiable information for your users. Since attacks are often aimed at these types of applications, you will definitely want to make sure your policies that identify high and critical threat security vulnerabilities are included during the evaluation of these types of applications.
Unfortunately, especially as the number of applications in your business increases, identifying an application by name may not be helpful. To address this, tags provide a way to quickly identify characteristics of an application.
Using specific text and color, tags can help group particular applications with similar attributes. While the tag can ultimately be anything you want, and attached to any application, you will want to take a much more thought-out approach, similar to what is recommended for labels.
As we will see later, in order to maximize the benefits tags can offer, you will want to take advantage of tag matching between policies and applications. For now though, let’s see how to create, apply, and delete tags.
Tags are created, edited, and deleted at the organization level and then applied individually for each application. There are two key ways to create a tag, again, only done at the organization level.
There is really no difference here, as both require that you have the organization open at the time of creation. The one advantage with using the Global Create button is that you can create a tag no matter which tab of the currently selected organization you are in, whereas you will need to be on the Tags tab otherwise.
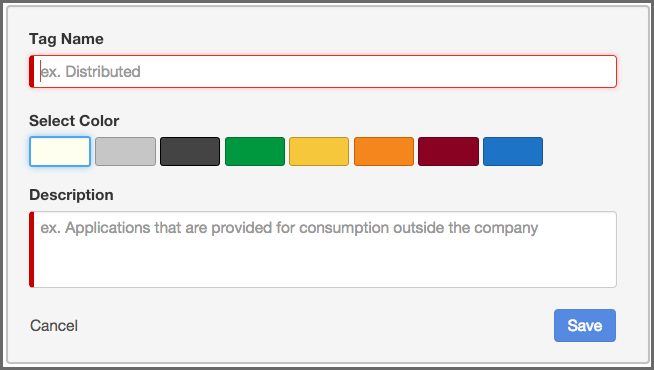
There are three elements of tag:
- Tag Name
- When creating your tag, keep in mind that the tag describes characteristics of an application, and will be used to match an application to corresponding policies. The name should be easily identified by the user.
- Tag Description
- The tag description is displayed when a user hovers the mouse over the tag. This can offer additional information, such as the types of policies that will be matched to applications that have applied the tag.
- Tag
- Color
The color selection is left to however your organization chooses to implement. The default is white.
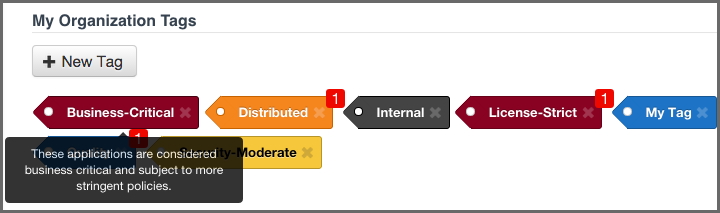
If you made a mistake and want to edit the tag, simply click on the tag body (anything but the x), and you can edit the tag information. However, if you want to permanently delete the tag, click on the x.
|
|
|
|
Deleting any tag will ask for you to confirm, since that action can not be undone. If the tag is currently applied to an application you will be shown the names of all applications that would be affected before you confirm the deletion. You will not be able to delete a tag that has already been related to a policy, and will be shown the names of any related policies if you try. Should you still wish to delete the tag, you will have to disassociate it from any related policies first. |
Depending on how your business uses tags, and establishes control within CLM, the people applying tags may be different from those creating them. It is important though to understand that while tags are provided to identify characteristics of an application, a more important usage is to provide a way for policy managers to create specific policies that consider those application characteristics. For this reason, when applying a tag, your application may be evaluated by a specific set of policies. This is a good thing, but it also makes the application of tags an act that requires careful consideration. To apply a tag to an application, follow the instructions below.
- First, log in to the Sonatype CLM Server using a user account with at least Owner-level permissions for the application (a member of the Owner Group).
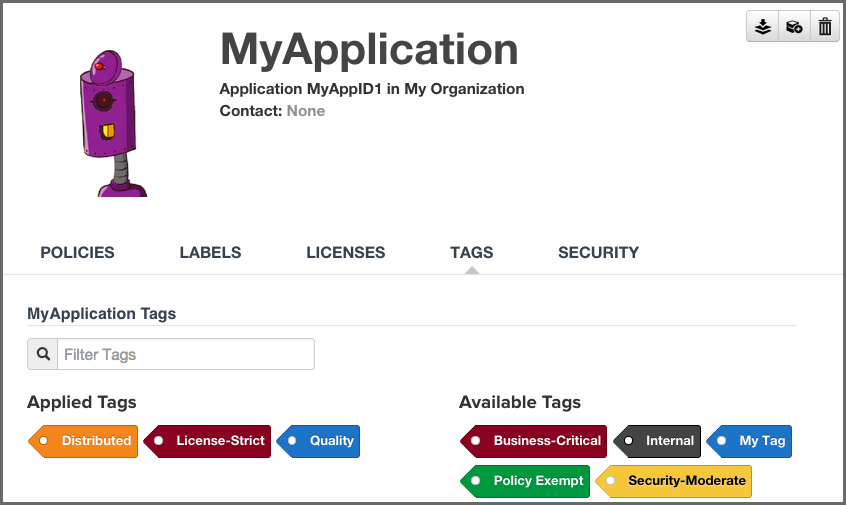
- Next, click on the Application link, and then click on the application you want to apply the tag to. The Application Management area will be displayed.
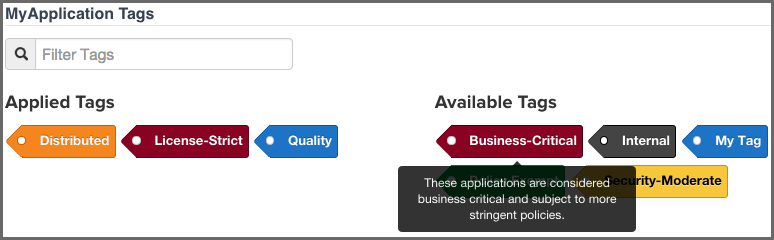
- Now, click on Tags tab. There are two columns, one for available tags, as well as those that have already been applied. Simply click on the tag to move it from one column to the other. If there are a lot of tags, and you are having trouble locating a specific one, simply type in the filter the name of tag you would like to use.
|
|
|
|
Mouse over a tag to see the full description. |
By now, you have likely created tags, and perhaps even applied some to your applications. Those are great features, but the real power of tags comes when we match a policy to a specific set of applications.
Up to this point (before tags), an organization-level policy would apply to all applications. To address this, you could create a new organization, or develop specific policies for each application, but in both cases, that results in a lot of micromanagement. In contrast, tags provide an opportunity to create a policy and then pick unique groups of applications (based on their applied tags) the policy should be evaluated against.
Given this, it is important to think about the applications your business develops, as well as the types of policies you will use to evaluate your applications. Elements like the type of data, the exposure (public or private), as well as whether or not the application interfaces with the Internet, are a great place to start.
When you create your tags, make sure that it’s clear to users that will be using the tags. In other words, it shouldn’t be ambiguous as to the type of applications the tags represent. For example instead of creating the tag, External, a more descriptive tag would be Distributed. Some additional tag suggestions might be:
- Sensitive Information
- Personal Information
These are just suggestions of course, but you should get the key point. When adding a tag to an application, you can expect policies that have identified the same tag to be evaluated against your application.
Now, that’s quite a bit of discussion on the theory and proper way to utilize tags, let’s take a look at how to make the match happen.
To select the tag a policy will be evaluated against:
- Create a new policy, or edit an existing one.
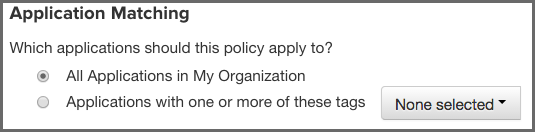
- In the Application Tags area of the policy editor, choose the tags that represent the applications you want to evaluate the policy against. By default, no tags will be selected. This means the policy will apply to all application regardless of their tags.
- Finish creating or editing your policy and click the save button. From this point forward, the policy will be evaluated against applications based on the tags you selected. In addition, applications will only see the policies they are evaluated against.
Policies that have been set to match applications with specific tags are visible in the same area as all other policies. However, there is a slight difference between what is displayed at the organization level and the application level.
- At the organization level
- All policies for the organization will be displayed. Policies that have selected specific applications, based on a matching tags applied to those applications, will be indicated by a special icon.
- At the application level
-
Only the policies that an application is evaluated against will be displayed in the Policy tab. This includes:
- Policies created at the organization level, and set to match all applications.
- Policies created at the organization level, and set to match specific tags currently applied to the application.
- Policies created at the application level.
|
|
|
|
When viewing policies at the application level, be sure to look for the
special tag icon
|