
The CLM Book - Optimized Component Lifecycle Management with Sonatype CLM
We just learned all about creating policies. Constraints, conditions and even actions, all make a lot of sense, but what in the world could labels have to do with policy?
Well, labels are actually one of the more powerful features of Sonatype CLM. They should have a familiar look, since you’ve likely used other systems that employ a sort of tagging or labeling.
Labels are metadata. More specifically a label is metadata that is assigned to a component within the context of a particular application or organization. Labels can assist with identifying components you want to review, approve, or even avoid altogether. We call this label assignment.
When labels are assigned, this is an action that takes place in the application composition report. Before it can be assigned though, a label needs to exist for a particular organization or application.
As we learned in our section regarding Organizations vs. Applications, inheritance plays a big role in policy. The same thing is true for labels, in that if a label is created in an organization, any application attached to that organization will also have the label available for use when assigned. In fact, the system will prompt you to choose the scope (organization or application) a label should exist in when it is assigned.
We’ve determined that assigning a label is an important action, but how do we build policy around this? That’s actually simple, we just add a condition, based on a specific label that you have created, being present. The one caveat, is that the label needs to exist within the application or the organization in which you are creating the condition.
There are two key ways to create a label:

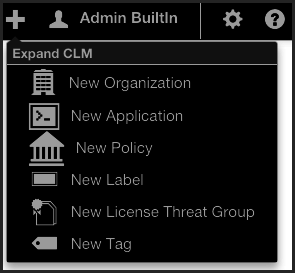
There is really no difference here, as both require that you have the organization or application open at the time of creation. The one advantage with using the Global Create button is that you can create no matter which tab of the currently selected organization or application you are in, whereas you will need to be on the Label tab otherwise.
When creating your label, remember to use something that is easily identifiable. If you’re following along with our example in the next section, Architecture-Approved is a good example.
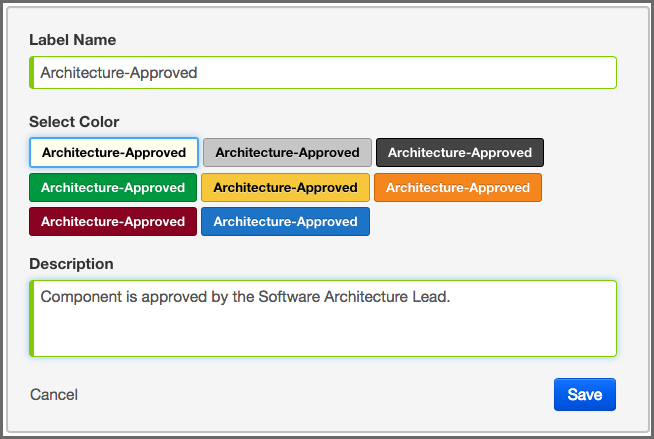
Once you have entered the name, you can enter an optional description, and then click the Save button.
- Editing Labels
- To make changes to a label, click on the label and the label information will be displayed below.
- Deleting Labels
- To delete a label, just click on the X next to the label name.
A few things to remember:
- An organization’s labels can be seen by any of its applications, the reverse is not true.
- Labels can only be edited (or deleted) at the level they were created.
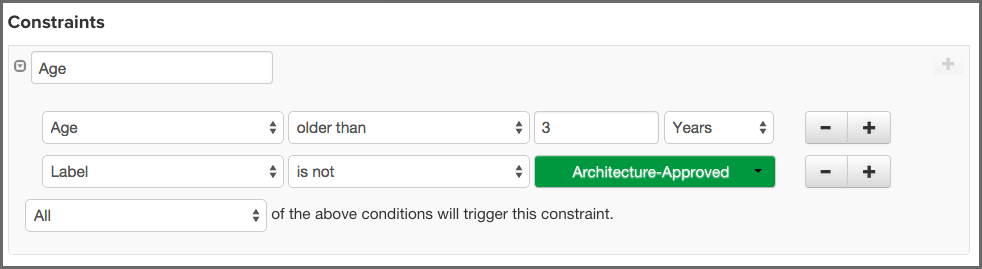
In the example below a new condition for the label Architecture-Approved will be added to an existing policy with an existing constraint and condition.
In our instructions, we’ve made an assumption that you understand how to create a policy.
- Open an existing policy.
-
In the Constraints area of the policy, click on the + icon, located next to the right of an existing condition.
![[Tip]](images/icons/tip.png)
Make sure you use the correct + icon, as it can be easy to add a new constraint by mistake.
- Now, in the Conditions area, change Label in the first drop down menu from Age to’Label'.
- Next, in the second drop down menu select is not for the operator.
- Finally, in the third drop down menu, select the Architecture-Approved label you just created.
- Click the Save button to finish.
|
|
|
|
Because our example uses a constraint with an existing condition, we have also chosen to force a violation only when all conditions have been met. In this scenario it may be appropriate to consider a waiver as an alternative. |