Documentation Nexus IQ Server 1.31

Our documentation site has moved. For the most current version, please see http://help.sonatype.com

Chapter 5. Quick Start Guide - Nexus Lifecycle

This guide can help you get IQ Server up and running for the purpose of trying out its features before installing it in your development environment. It should take approximately 15 minutes to complete using sample policies and applications.

[Note]

Nexus Lifecycle requires a license in order to experience the functionality described in this guide. If you are looking to try or purchase, Nexus Lifecycle, schedule a demo or contact us, and we’ll be happy to assist.

Step 1: Installing and Starting IQ Server

Installing the IQ server is really a case of downloading the archived server, picking a location, and unpacking the contents. Since we won’t be focused on mimicking a production experience, most laptop and desktop configurations should run IQ Server with no problem. If you are looking to plan for the future though, be sure to review the server requirements section of the Requirements chapter.

  1. Create an installation directory in your desired location.
  2. Download the latest version of IQ Server to the installation directory.
  3. Extract the tar.gz or .zip file.

Once you’ve extracted the contents, follow the steps below to run IQ Server

  1. Using a command line interface, switch to the nexus-iq-server bundle directory in your installation directory e.g. nexus-iq-server-x.xx.x-xx-bundle.
  2. Run one of the following commands to start IQ Server:

    Linux or Mac: ./demo.sh

    Windows: demo.bat

  3. Open IQ Server in a browser using the default URL: http://localhost:8070
  4. Log in using the default Administrator account:

  5. Install the required product license supplied to you by the Sonatype Support team.

    1. Click Install License.
    2. Navigate to the license file (.lic) and click Open.
    3. Click I Accept to accept the End User License Agreement.
[Note]

IQ Server needs access to an external data service to perform evaluations, which may be blocked in your internal environment. For a workaround, see Running IQ Server Behind a HTTP Proxy Server in the IQ Server documentation.

Step 2: Importing Sample Policies

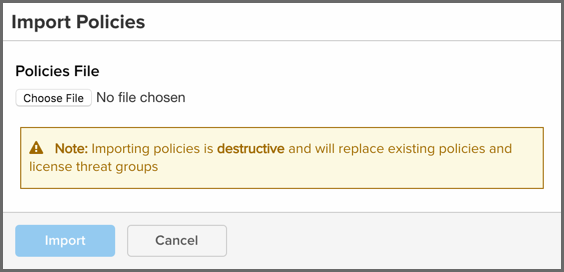
Policy is at the core of IQ Server’s automation capabilities. While you can create a completely custom set of policies, importing the Sonatype Sample Policy set set is the quickest way to get started. This set includes multiple policies for triggering violations on security vulnerabilities, licensing issues, architecture issues, and more.

  1. In a separate browser tab or window, download the Sonatype Sample Policy set (.json file) from the IQ Server documentation.
  2. In IQ Server, click the Organization & Policies icon figs/web/clm-server-manage-app-org-icon.png on the IQ Server toolbar.
  3. The Root Organization should be selected in the sidebar. Click the Actions menu and select Import Policies.
  4. In the Import Policies dialog, click Choose File, select the .json file you downloaded, and click Open.
  5. Click the Import button.
figs/web/clm-server-policy-import-dialog.png

Figure 5.1. Import Policy Dialog


Step 3: Configuring Organizations and Applications

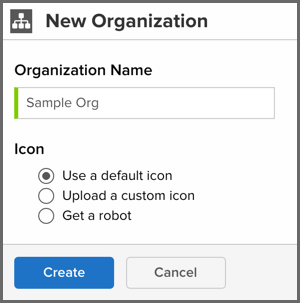
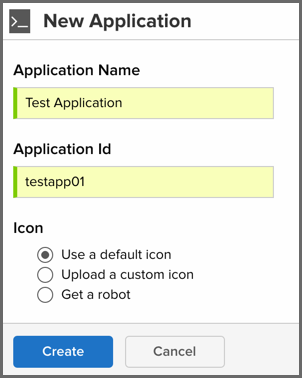
When evaluating applications, understanding IQ Server’s system hierarchy is critical: Root Organization, organization, and application. This means policies and other configuration items are inherited from the Root Organization on down. This allows for easier policy management especially when you have multiple organizations and applications. Thus, in order to evaluate an application, you must have at least one organization and a corresponding application.

Creating an organization
  1. In the Organization & Policies area, with the Root Organization selected in the sidebar, click the New Organization button.
  2. In the New Organization dialog, enter a name into the Organization Name text box.
  3. Click the Create button.
figs/web/clm-server-view-organization.png

Figure 5.2. New Organization Dialog


Creating an application
  1. With your newly created Organization selected in the sidebar, click the New Application button.
  2. In the New Application dialog, enter an Application Name and Application ID.
  3. Click the Create button.
figs/web/clm-server-view-application.png

Figure 5.3. New Application Dialog


Step 4: Evaluating Applications

After you install, start, and configure IQ Server, you are ready to evaluate applications. If you need a sample application, you can download WebGoat (webgoat-container-x.x.x-war-exec.jar) at https://github.com/WebGoat/WebGoat/releases.

To evaluate an application:

  1. In the Organization & Policies area, select your application in the sidebar. The file that you evaluate will be associated with this application.
  2. Go to the Actions menu, and click Evaluate Binary.
  3. In the Evaluate a Binary dialog:

    1. Click the Choose File or Browse button, select the file to evaluate, and click Open.
    2. Click to select any stage to associate with the evaluation (e.g. Build).
    3. Click No to prevent sending notifications of policy violations as defined in the policy’s configuration settings.
    4. Click the Upload button to begin evaluating the selected application. An Evaluation Status message is displayed.
    5. When the evaluation is complete, click the View Report button to open the Application Composition Report for the application.

Step 5: Reviewing Results

Once evaluated, the results of a binary evaluation are displayed in the Application Composition Report, which you can always access by clicking the Reporting icon figs/web/clm-server-reporting-icon.png on the IQ Server toolbar.

The report’s information is divided into four tabs:

  • Summary - An overview of identified components and their policy alerts, security issues, and license analysis.
  • Policy Violations - A list of violated policies and the components that triggered them sorted by threat level from from highest to lowest.
  • Security Issues - A list of security vulnerabilities and the components that triggered them sorted by threat level from highest to lowest.
  • License Analysis - A list of license issues and the components that triggered them sorted by license threat from highest to lowest.

For a more thorough explanation of the report, see the Application Composition Report chapter in the Nexus IQ Server Documentation.

figs/web/iq-app-comp-report.png

Figure 5.4. Application Composition Report


Step 6: Investigating & Remediating Violations

In the Application Composition Report, you can drill down to learn specific details about a violation. In every tab (except the Summary tab), you can click an individual component to open the Component Information Panel (CIP). The CIP displays many details, which are divided into different sections or tabs. To get you started using the CIP, take a look at these sections:

  • Component Info - In the graph, you can move the vertical bar to learn the differences between versions of a component.
  • Policy - You can click the Waive button to force IQ Server to ignore a policy violation.
  • Licenses - You can track your research about a particular license and even override one.
  • Vulnerabilities - You can click Info for a thorough explanation of a component’s vulnerability and a recommended action.
  • Claim Component - You can tell IQ Server to recognize a component even though it was previously identified as unknown.

This is just a small sample of the component information available in the CIP. For a complete discussion of the CIP, see Component Information Panel in the Nexus IQ Server Documentation.

figs/web/iq-cip.png

Figure 5.5. Component Information Panel