
Optimized Component Lifecycle Management with Sonatype CLM
You’ve likely heard that Sonatype CLM provides you with information about the components inside your applications. In addition to that information, you will see whether or not that component meets the rules for component usage that your organization has established - in other words, your policy. In order to provide that information however, there needs to be a link between your application and Sonatype CLM. But, how do we create that link, and where do we start?
Well, let’s do a little introspection, and take a look at the idea of organizational structure.
When you launch Sonatype CLM for the first time, even after setting up and configuring your security parameters, there will be little to no information, a blank slate if you will.
Now, you could go off and simply start creating organizations and applications. It’s a fairly simple process. However, it would be wiser to think about how your particular business organizes applications. For many teams this follows a "command and control" structure, or rather one where various business units are responsible for specific applications. For others, applications create more logical categories, such as internal, or perhaps, commercial units, each having sets of applications below them.
In both cases there are units which simply contain applications, and there is some correlation between each application, even if it is only surface level. This idea of containers and correlation is the exact principle behind organizations.
Organizations, when looking simply at their most basic function, serve as a container for applications. While we cover how organizations manage policy and the other policy elements in just a moment, it’s important to think about how you will set up your organizations. Perhaps, even create a map, or at the very least, visual containers and recording which applications would go where.
Once you’ve done that, let’s create an organization.
- Log into the Sonatype CLM Server (by default this is available at http://localhost:8070) with a user account that has at least Admin-level permissions (a member of the Admin Group).
-
Next, click the Organizational Design icon
 to
access the Organizational Design area.
to
access the Organizational Design area.
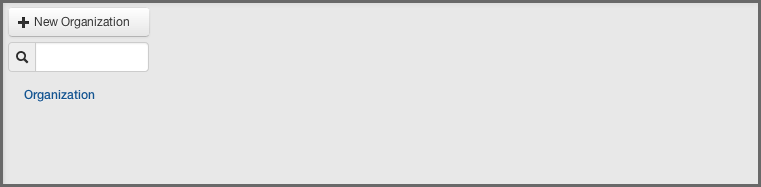
- Now, click the Organizations link (located in menu on the left). This will open the Organization Management area, and once there, click the New Organization button (displayed in Figure 3.1, “Creating an Organization”).
- Click on the text Enter Organization Name and type the desired name. This can be any name you choose, but remember back to your thoughts on the various business units your business may have.
- Optionally, you can add an image that will be an icon for your organization by hovering over the image and clicking Choose Icon. The image should be sized to 160 x 160 pixels and use the PNG format. Images with different sizes will be scaled. Alternatively you can press Want a robot to use a robot image. Each time you click on the link, a new robot image will appear.
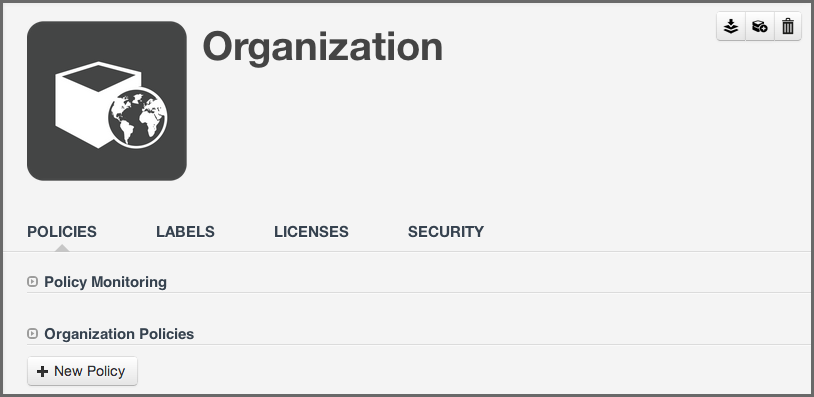
- Click the Save button to continue. You will be directed to the overview screen for your brand new organization displayed in Figure 3.2, “Organization Overview Screen”.
Tip
If you know your organizational structure, go ahead and continue creating your organizations to match it.
Earlier, we talked about a link between applications being developed, and the policy that will be governing the components used in those applications. That link is the concept of an application in Sonatype CLM, and you will need to link the application your are working on to an application record inside of Sonatype CLM
In Sonatype CLM, much like your development process, an application starts with a name. That name can be anything you want it to be, but it should be something people recognize. For example, Employee Intranet Application for Android, or International Bank Transfer Application. It is, quite simply, just a name, and it should be one that your users can identify with easily, as this is the name they will see in the various tools that connect to Sonatype CLM.
That name takes on quite a bit of importance when you add another element, the Application ID. An Application ID, or App ID, is a unique identifier that you define for the application. In many ways, it’s like a national identifier for the application.
Combining the Application Name and the App ID, you have everything you need to link your actual applications, those being developed and delivered, to an application record in Sonatype CLM. The final piece is to pick the organization. Let’s go ahead and take a look at this application process in action.
- Log into the Sonatype CLM Server (by default this is available at http://localhost:8070) with a user account that has at least owner level permissions for the application’s selected organization (a member of the Owner Group for the application’s selected organization).
-
Next, click the Organizational Design icon
to
access the Organizational Design area.
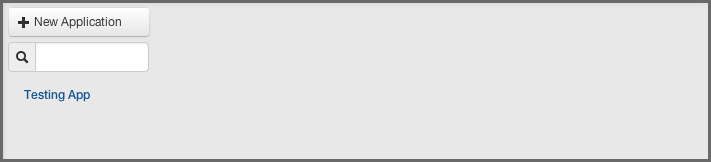
- Now, click the Applications link (located in menu on the left). This will open the Application Management area, and once there, click the New Application button (displayed in Figure 3.3, “Creating an Application”).
- Click on the area labeled Enter Application Name, and type the application name.
- Enter an application identifier by clicking in the area labeled Enter ID.
- Choose the organization by clicking the Select Organization drop down and selecting the desired organization
-
From here, there are two additional options
- First, you can choose a contact person for the application. The contact will be displayed in the reporting area of Sonatype CLM, as well as the PDF version of the report. When choosing a contact, it’s best to think of this as the person that is responsible for the application, or at the very least, should be contacted if there is an issue. To choose the contact, click the area next to the contact field. This will open a search dialog modal, allowing you to select a user (including those from any connected realm - e.g. LDAP). It is important to note, that if you are setting a contact, you will need to at least be a member of the owner role for the parent organization, which is also required to save the application you are trying to create.
- Second, you can add an image that will be an icon for your application by hovering over the image and pressing Choose Icon. The image should be sized to 160 x 160 pixels and use the PNG format. Images with different sizes will be scaled. Alternatively you can press Want a robot to use a robot image. Each time you click on the link, a new robot image will appear.
- Once you clicked the Save button you will be directed to the overview screen for your brand new application displayed in Figure 3.4, “Application Management Area”.

Warning
Be careful when selecting your organization, as this can’t be changed once the application is created.
So we understand the difference between organizations and applications, but how should this affect how we manage policy?
In fact the concept of policy may still be confusing. For now though, let’s just think about it as a set of rules for components you can or can’t use in your applications. Given this, each application is different, why not create policy (rules) for each individual application?
This is actually a common question when it comes to creating your policies for the first time. Our inclination tends to be to match a policy to an application. That is because we can sometimes think of applications as being very unique, and for that reason they will each have their own policies, different from other applications. This might be true. However, inheritance from an organization to an application plays a big role in making policy management much easier. Let’s look at how the concept of inheritance works.
Because an organization can have multiple applications attached, and those applications inherit policies as well as labels, and license threat groups, creating a policy at the organization level allows us to manage a single policy across hundreds of applications. With this inheritance, you can make one modification and have that change affect all, or at least large numbers of, applications.
Now, lets put this in contrast with creating a policy at the application level, which seems similar, but the lack of inheritance from one application to another changes things up.
In the case of organization level policy (rules), which appears across many different applications, the application level policy is meant for precise scenarios where the policy is only intended for a single application.
Doing this takes into account something specific we want to identify or keep out of a single application, but not others. The more of these application level policies that are created though, means the more micromanagement, and in turn, opportunity for error, will occur. So, keeping them at a minimum, and only for those unique scenarios is ideal.
This is likely better conveyed in an example. Imagine two applications with 4 policies each. Two policies for these applications are identical. If you have this setup with two separate applications, any change to the identical policies has to be done once for each application. However if we move these policies to the organization that both applications belong to, we only have to change one. Now imagine a similar scenario with a larger number of shared policies as well as applications. Without organizations to inherit from this would become unmanageable quickly.
Alright, we understand organization level policies are a good idea, and application level policies should be used as minimally as possible. This tends to create a question of, "How do I know when to create an organization vs. application policy?" In reality the first limitation will actually be related to what you have access to create and/or view.
Security administration can’t really begin to take place until your first organization and application are created. This will need to be done by an administrator, as demonstrated in the examples above.
Once created, each organization and application has two available roles displayed in the Security section of the application and organization overview.
- Owner
- has full access to manage policy for the assigned organization or application.
- Developer
- has view only access for the assigned organization or application.
Note
Assigning a person to an organization role grants the same permissions to the applications within that organization.
Once you understand permissions, you can develop policies. Communicate with others to avoid micromanagement. If you don’t have access to create an organization-level policy, it doesn’t mean that it wouldn’t benefit to create policy for applications within that organization.
OK, so in total, this first concept of organization vs. application is pretty simple. However, it’s important to remember what you do here is setting up how you can manage policy later. If you followed our steps you should have done at least two things in this section:
- Created an organization
- Created an application
You should also have a clear understanding about inheritance and how organizations and applications differ. Finally, when you are first starting out, it is a good idea to experiment by creating a few one-off policies at the application level. Be diligent though, when you find yourself copying constraints and conditions into policies used by more than one application, it’s likely time to consider simply adding the policy at the organization level.