Roles provide a set of permissions that grant various levels of access and control over the IQ Server as well as the connected suite of tools. To grant permissions to a user, you assign that user to an administrator or organizational role at one of the levels in the system hierarchy: organization or application. Which role and level you choose for a user determines what permissions that user receives.
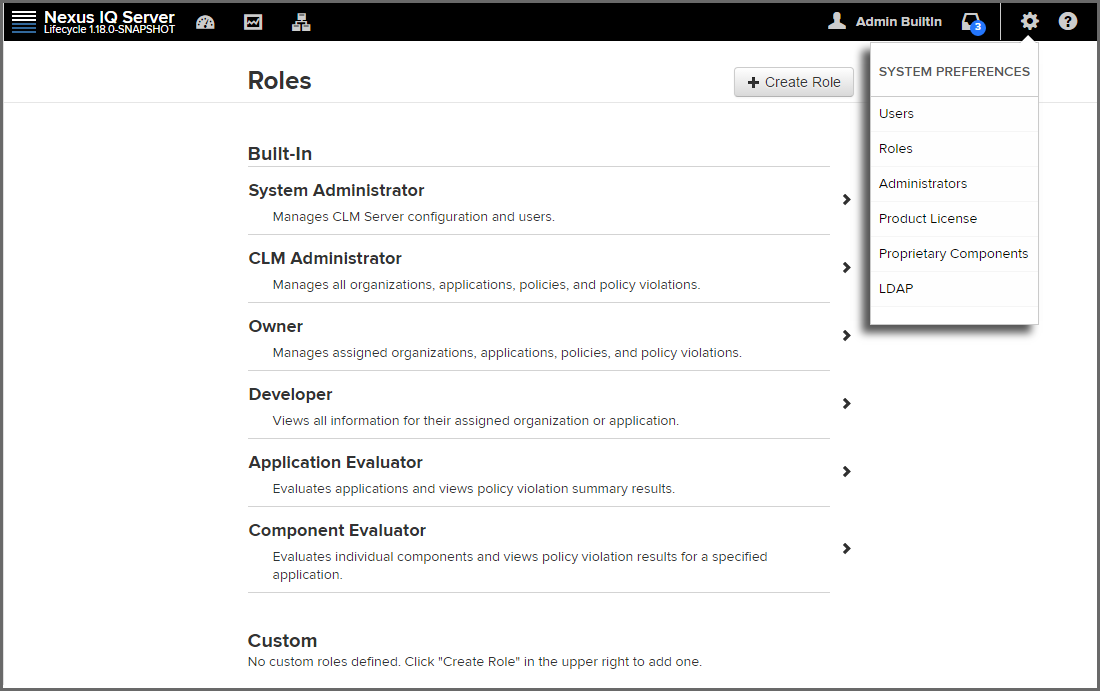
IQ Server has several built-in roles, which are shown below. If one does not suit your needs, you can create a custom role.
To view roles in IQ Server:
|
|
|
|
Only a user assigned to an administrator role can see the information below. If you are using the built-in Admin user account, it is assigned to all administrator roles. It is highly recommended that you change the Admin password. |
To view permissions assigned to built-in roles:
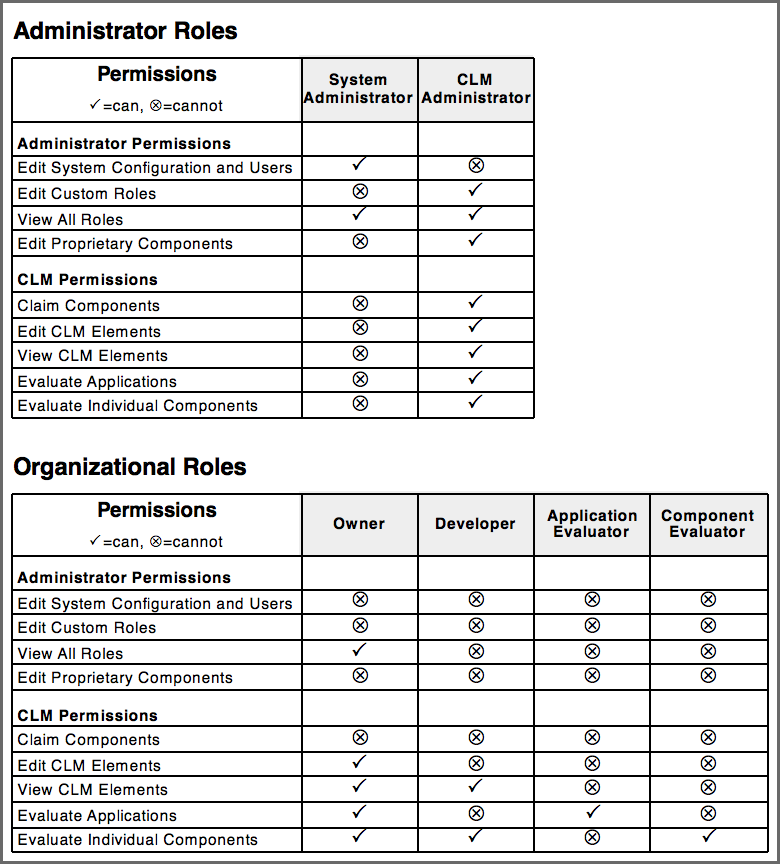
The built-in roles have the permissions shown below.
|
|
|
|
CLM Elements includes organizations, applications, policies, labels, license threat groups, tags, policy violations and waivers. |
The scope of permissions granted to a role is governed by where that role is assigned in the system hierarchy. A role assigned to:
To apply this logic, consider a role with permission to Edit CLM Elements. If a user is assigned to that role at the application level, the user cannot create applications. However, if a user is assigned to that role at the organizational level, the user can create applications.
To assign a user to a role:
Determine which type of role you want for a user:
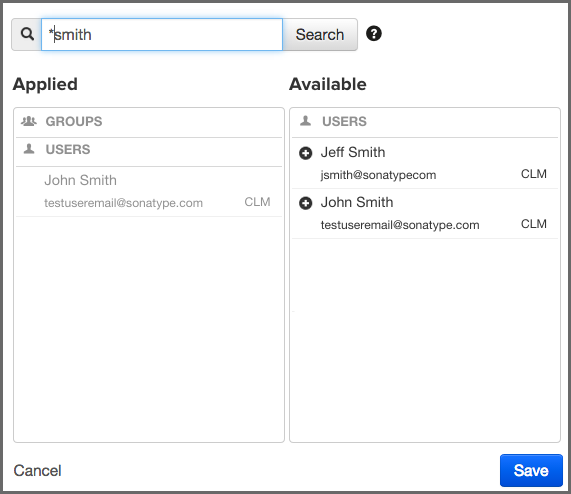
Locate a user in the search dialog box by following these steps:
Enter as much of the user’s complete name as possible, followed by a trailing wildcard (e.g. Isaac A*).
|
|
|
|
The use of a wildcard can greatly impact search times. Be careful in how you use one. |
|
|
|
|
As shown above, you may see an email address listed as well as a realm (such as an LDAP realm). You can use this information to ensure you are working with the appropriate account. |
|
|
|
|
You must have permission to Edit Custom Roles if you want create a custom role. The default Admin account and the built-in CLM Administrator role have this permission. |
To create a custom role:

|
|
|
|
Custom roles are limited to providing permissions for a specific organization or application. The ability to create an organization is not included in the permissions available to custom roles. Only a CLM Administrator can perform this action. |
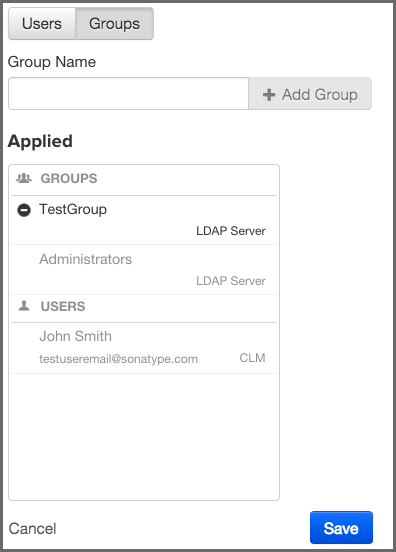
Assigning a group to a role utilizes elements that are configured via the LDAP System Preferences area. If you go with the default options, groups will be included with the search results. That is, when you enter something into the Find User field, both groups and single users will be returned.
However, because the size of LDAP implementation can vary, you may want to consider not including groups with your search results. This option can be adjusted when using Dynamic Groups settings.
Making this change will then allow you to manually enter group names. However, when entering groups this way, no search or validation will be performed.