Roles provide a set of permissions which grant various levels of access and control over the Sonatype CLM Server, as well as the connected suite of tools. In the following sections we’ll describe how to access role definitions, view the associated permissions, create custom roles, and assign users to a role.
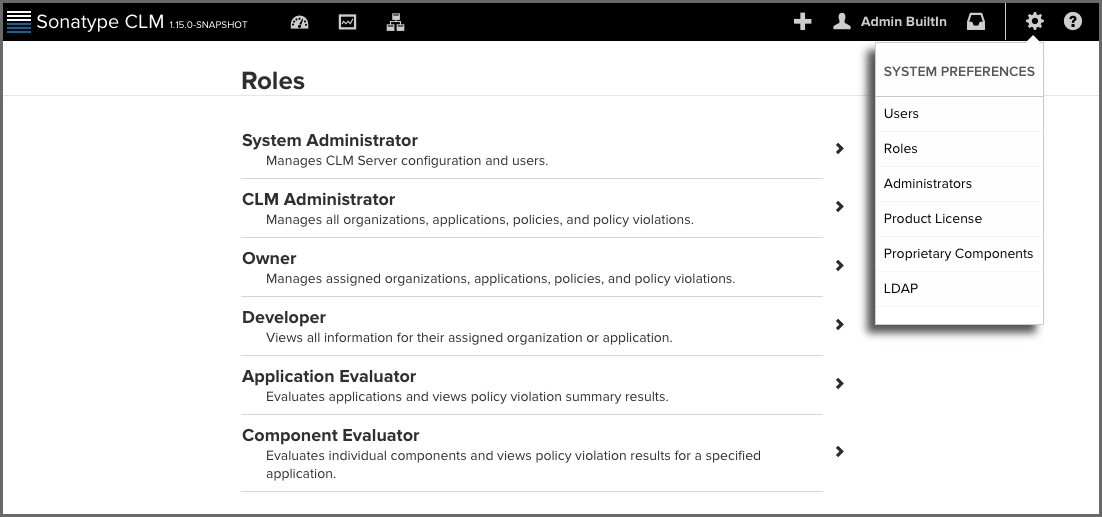
To view role descriptions:
|
|
|
|
You will need to be assigned to one of the administrator roles in order to see the information above. It is important to note that if you are using the built-in Admin user account, it has been assigned to all administrator roles, and we highly recommend changing the password. |
Users can be assigned to two types of roles: Administrative and/or Organizational. Each of these roles has a slightly different scope that can affect overall permissions.
There are two types of administrator roles, each allowing a user to affect the system globally in a unique way.
To assign a user to a role…
First, determine which type of role you want to assign a user to.
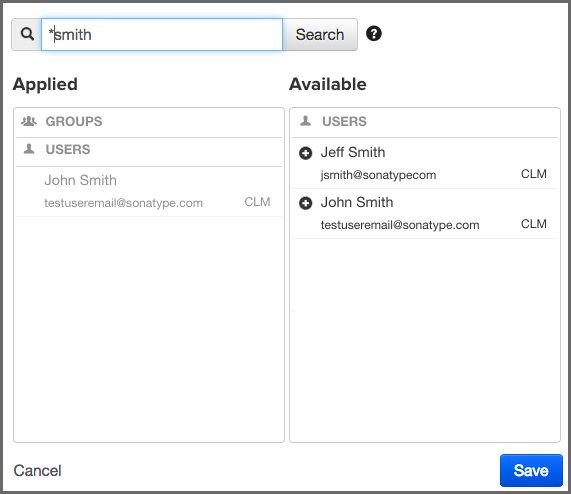
A search widget will be displayed. In the search field, enter as much of the user’s complete name as possible, followed by a trailing wildcard (e.g. Isaac A*), and then click the Search button.
|
|
|
|
Practice caution as use of leading wildcards can greatly impact user search times. |
Once you see the user you wish to add in the Available column, click the Plus icon to move them to the Applied column. To remove users from a role, follow the same process above, just click the Minus icon to move the user from the Applied column to the Available column. Click the Save button to save your changes.
|
|
|
|
You may notice that below each user, there is additional information. Most often this is the email. However, to the right of the email you will see the realm (e.g. LDAP). Use this to ensure you add the appropriate account. |
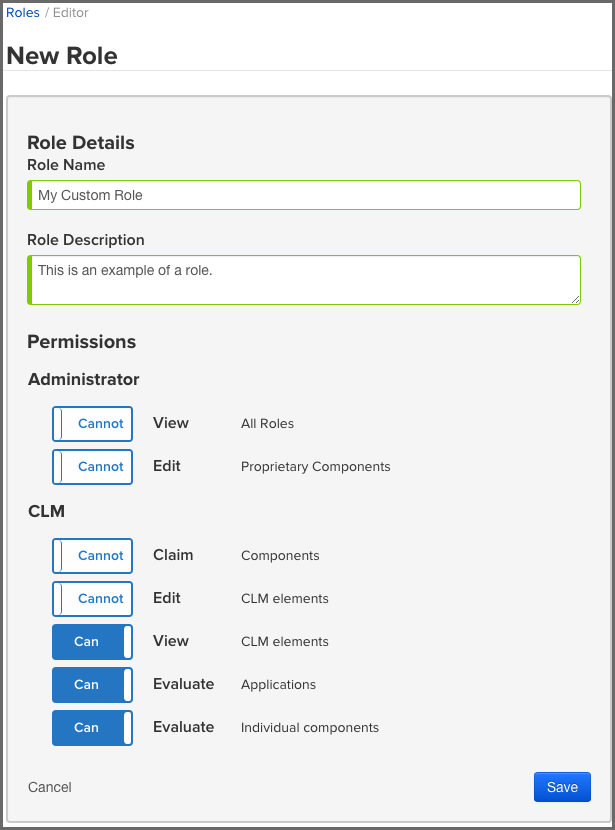
The Sonatype CLM Server ships with a set of built-in roles. While these roles cannot be modified, you can create your own custom roles. To perform this action, you will need a user that has the permission to Edit Custom Roles, e.g., the default admin account and the CLM Administrator role that ship with the Sonatype CLM Server have this permission.
To create a custom role:
|
|
|
|
Custom roles are limited to providing permissions for a specific organization or application. The ability to create an organization is not included in the permissions available to custom roles. Only a CLM Administrator can perform this action. |
Assigning a group to a role utilizes elements that are configured via the LDAP System Preferences area. If you go with the default options, groups will be included with the search results. That is, when you enter something into the Find User field, both groups and single users will be returned.
However, because the size of LDAP implementation can vary, you may want to consider not including groups with your search results. This option can be adjusted when using Dynamic Groups settings.
Making this change will then allow you to manually enter group names. However, when entering groups this way, no search or validation will be performed.