At some point, your applications will be out of development, have completed their final build, moved beyond staging, and have been officially released. However, while there shouldn’t be changes to your application that is now considered to be in production, new security vulnerabilities and license issues could arise. For this reason, as well as any other, Sonatype CLM allows you to monitor individual policies for each application.
When a policy is monitored, you pick an application, as well as a Sonatype CLM stage to monitor to use as a base for evaluating policy against. After that we’ll show you how to configure which policies you would like to receive a notification for, given a component is found to be in violation.
If some of this sounds familiar, that’s good, because it is nearly identical to standard policy evaluation, component violations, and the notification option for policies. There really is no difference other than being able to choose which Sonatype CLM stage you will use for monitoring. Though that is a powerful option.
In this section, we’ll cover everything you need to setup policy monitoring at the organization and application level. In general, we make a few assumptions, including:
If any of these sounds like strange concepts, you’ll want take a few steps back and go over those topics first. With that said, let’s go monitor some policies.
|
|
|
|
Policy Monitoring is not available to customers with a Nexus CLM License. Contact your administrator for additional information. |
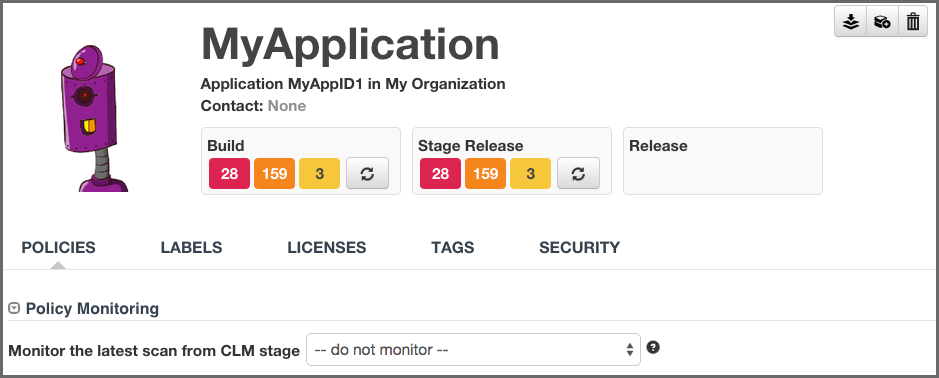
The setup for policy monitoring is straightforward. In general you will likely want to avoid monitoring every single policy. Not only is that a lot of policies to monitor, your signal to noise ratio will be off. That is, you might possibly get a lot of notifications for things like old component, or components that are now unpopular.
That’s not to discourage you from monitoring these policies, they are important to. However, monitoring, and in turn, the notifications that are associated with monitoring are best reserved for policies that deal with elements like security vulnerabilities and license issues - that is, those representing a high level of risk.
While you can choose any application to monitor, most people start by monitoring an application in production. In many cases production applications have likely been around longer than your implementation of Sonatype CLM. However, you are not prevented from choosing any application to monitor.
Great, now you can move on to picking the stage you want to monitor.
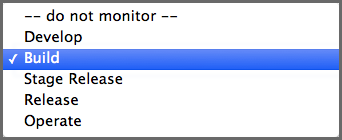
Each of the Sonatype CLM Stages available for monitoring, are identical to the Sonatype CLM stages displayed when setting policy actions. In general, if you are going to be monitoring a production application, you will want to choose the stage that represents the most recent data. For our example, we’ll choose Build, but again, you can choose any stage.
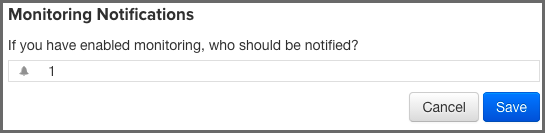
You are almost there, now all you need to do is add notifications.
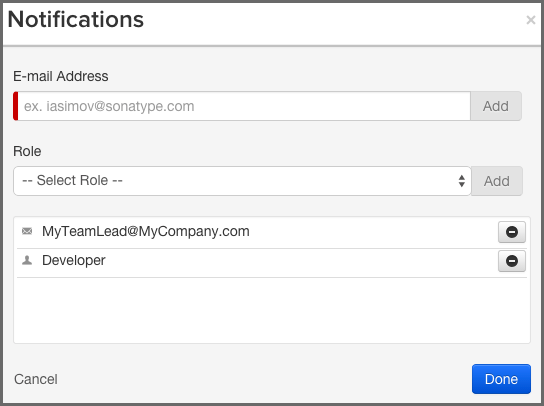
Each policy you want to monitor will need to have someone added to the notifications. These are set below the Actions section of each policy.
|
|
|
|
Remember, you can only edit a policy based on your permissions and where it was created, if you don’t see the edit button for a policy, you either need to adjust your permissions, or switch to the organization the policy was inherited from. |
Congratulations! Your application now has a policy that will be monitored. To monitor more applications and/or policies, simply repeat the steps above.
|
|
|
|
While it is possible to follow these same steps and set policy monitoring at the organization level, you may want to think through that a bit more before blanketing all applications within a particular organization with policy monitoring notifications. In many cases, we find that monitoring is best done on a few, high risk, production applications. |
By default any new notifications for policies that are being monitored will be sent out at 12 AM (per the CLM Server time). If you would like to update this, simply edit your config.yml file for the Sonatype CLM Server. The lines you will need to look for are as follows:
# Hour of the day(0-23) to schedule Policy Monitoring execution. The
default is midnight.

#policyMonitoringHour: 0