
Step 3 - Security Administration
As we mentioned previously, there is another role type, the Global Role. Global roles operate independently from standard roles, and at this time only includes Administrators. Any member of the Administrator Role will have access to every aspect of Sonatype CLM, including the ability to create new organizations and delete existing ones. Additionally, this administration role has the ability to assign users to any other role on Sonatype CLM.
Adding a user to the Administrator role is similar to standard roles, however it is managed in the Security section of CLM System Preferences. Also, just as with Standard Roles, if you have configured LDAP Users or LDAP Groups, those will be returned when searching for users. To add a user to this role:
- First, log into the Sonatype CLM Server (by default this is available at http://localhost:8070) using a user account with Admin-level permissions (a member of the Admin Group).
-
Click the system preferences icon
 located in the top right of the CLM Header/Screen (resembles a cog/gear).
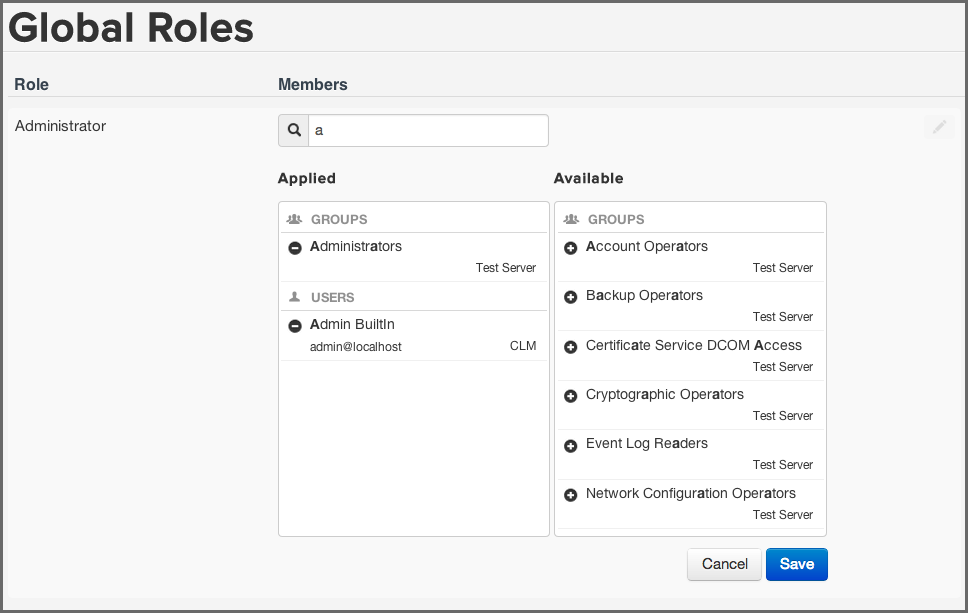
- Choose Global Roles from the drop down menu. The Global Roles System Preferences area, and a list of roles will be displayed.
- Next to the role name a list of users that are assigned to will be displayed. To edit this list, hover over the role you wish to add a user to, and then click the Edit icon.
- To find a user, begin typing the user’s name in the search field. No matter what you type, Sonatype CLM will find the best match, bolding the matched text in both the applied and available columns. As mentioned above, if configured, LDAP Users and Groups will also be displayed here.
- In some cases, you may be using multiple realms beyond that of Sonatype CLM, for example, LDAP for Active Directory. In these cases the Realm information will also be displayed.
- Once you see the user you wish to add in the Available column, click the Plus icon to move them to the Applied column.
- Click the Save button to save your changes.
Tip
You may notice that below each user, there is additional information. Most often this is the email. However, to the right of the email you will see the Realm (e.g. CLM). Use this to ensure you add the appropriate account (e.g. when working with CLM the local realm, and LDAP).
Note
To remove users from a role, follow the same process above, just click the Minus icon to move the user from the Applied column to the Available column.