
Optimized Component Lifecycle Management with Sonatype CLM
In some cases, the licenses of a component is the last thing a development team will think about. This could simply be due to a misunderstanding of open source, or a situation where it’s nearly impossible to do the exhaustive research needed to determine the license for a given component, especially dependencies. With Sonatype CLM this problem is a thing of the past.
Even if you haven’t built policies around licenses the License Analysis tab provides license information about every component found in during a scan of your application.
This license information is provided via data collected from the Central Repository, as well as research conducted by Sonatype. In addition to the license information for each component, we’ll also assess a threat of each license, based on a set of default License Threat Groups. As with Security Issues, the best place to start is with the component list in the License Analysis tab, and then move into looking at additional details for individual components, making any license status changes as you see fit.
Before going into the details of information displayed in the License Analysis section for the application composition report, it is best to establish a clear understanding of license threat groups.
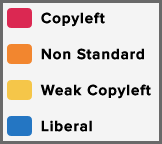
License threat groups are essentially a set of groups of similar licenses, each with a corresponding threat severity (red, orange, yellow, and blue). Licenses are placed into these groups, and when a component is found to have this license, it is flagged to the corresponding threat group. This is then conveyed in the Sonatype CLM Server in multiple areas, including the Summary tab and the License Analysis tab.
A default set of license threat groups are provided when you install Sonatype CLM for the first time. Additional license threat groups can be imported with our sample policies or manually created. In both cases, these can be changed and managed in the Sonatype CLM server.
Tip
How you manage your license threat groups directly impacts how threat is translated in the reports.
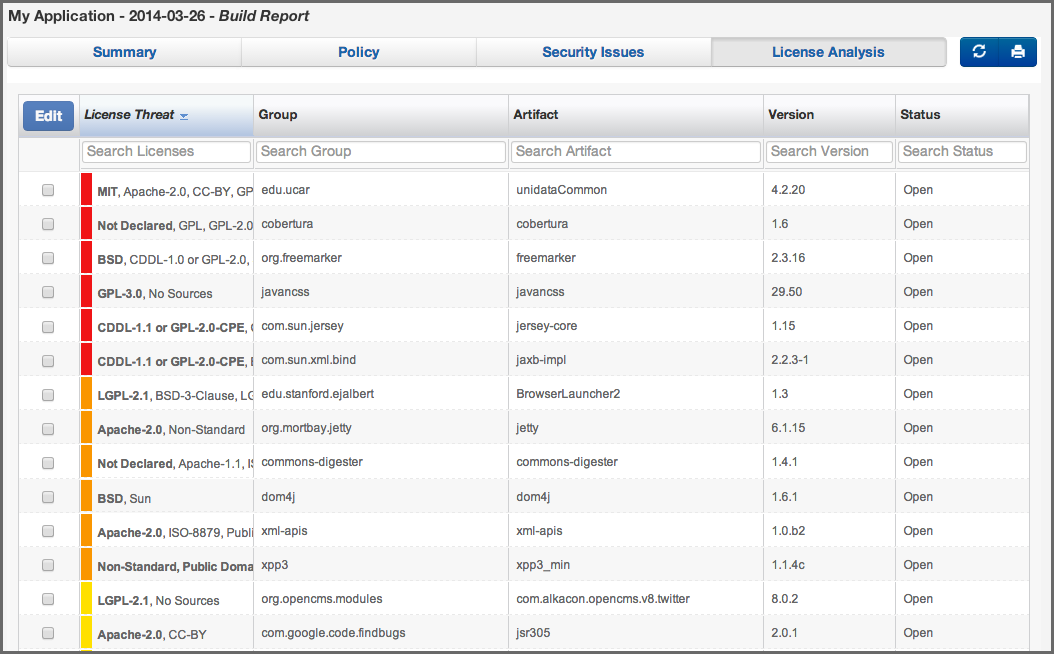
The component list on the License Analysis tab is more similar to the list on the Policy tab, because it is a list of all components, not just those that have a license issue.
The list itself includes columns for License Threat, the component’s GAV, and a Status of the license issue. Clicking on the column provides sorting, while specific items can be searched using the field just below the column heading.
- License Threat
-
The list of components is ordered by license threat which is based on the threats assigned to the license threat groups. Though a single component may actually have several licenses, license threat will only show the highest threat. This threat, as we mentioned earlier, is based on four default categories, which correspond to four default license threat groups of the same name.
- Critical
- Severe
- Moderate
- No Threat
- Status
- License status, like status for security vulnerabilities, allows you to track the process for license related research. In addition it provides a way to override a license in situation where you believe the license to be incorrect, or there is an option to choose a specific license. We’ll discuss that process a little bit further down.
To access the CIP for a component on the License Analysis tab, simply click on the component row. It will expand providing details in a number of sections. You will likely notice this looks the same as other CIP panels when clicking on other tabs of the application composition report, and you would be correct. There is nothing additional provided by accessing the CIP via the License Analysis tab of the report. However, for this section, we want to focus on the license related information in the Component Info section, as well as the entire Edit Licenses and Audit sections.
- Component Info
-
Again, the information contained here would be the same, whether or not you clicked on the component in the License Analysis tab. However, this gives us the context to talk about the License related fields in this section.
- License Identification Types
-
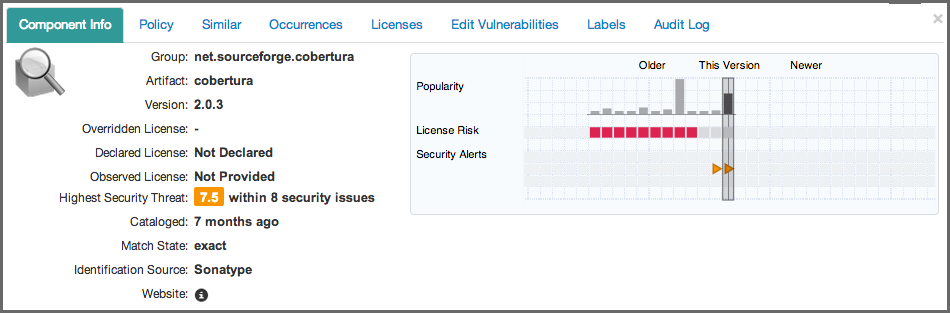
On the left side of the Component Info section, you should pay attention to three fields, which are described below.
- Overridden License
- If you have edited the license for the component, that license will be displayed here.
- Declared License
- these are the licenses that the developer of the component has identified.
- Observed License
- these are the licenses that have been observed during Sonatype’s research.
- License Identification Values
-
In cases where there is no declared and/or observed licenses, a message will be displayed. There are several options, each with specific meaning:
- No Source License
- sources were provided, but there was no license data found.
- No Sources
- indicates we have no sources for the component.
- Not Declared
- indicates nothing was declared by the author/developer.
- Not Provided
- will appear when the license is actually null, and is unique to claimed components, but might also happen while new components are being processed by Sonatype.
- Component Graph
- The graph itself is laid out like a grid, with each vertical piece representing a particular version. The selected version being identified by a vertical line.
While the information displayed in the graph includes popularity, and security information, right now, just take a look at License Risk. This will display the license risk based on the application that is selected, and the associated policy and/or license threat groups for that application. Use the application selector to change the application, and corresponding policies the component should be evaluated against.
Editing a license can be used for different purposes. One addresses the workflow of your research into a license related issue, while the other allows you to completely override a license all together. We’ll cover all this below, but first let’s take a look at the information displayed.
After clicking on a component in the list, and then the Licenses section of the CIP, the left side of the CIP displays the license(s) declared by the developer of the component, as well as those observed. Next to each of these licenses is a box, displaying the severity of the license. This list can get long, so you may have to scroll to see all the licenses. Then, to the right of the license list, there are four drop down lists.

- Scope
- Scope allows you to apply the license status to this component by choosing application or to all components attached to the current application’s organization by choosing organization.
- Status
- As we mentioned previously, Status provides a way to track your research, override a license, or select from an option. The available options are included below.
- Open
- This is default status, and will be included in the count of license issues.
- Acknowledged
- Acknowledged indicates the issue is being researched, and will still be included int he count of license issues.
- Overridden
- This status will allow you to select a license (from the License(s) drop down), overriding any license that has been declared or observed.
- Selected
- In cases where there are multiple licenses, using selected will populate the License(s) drop down with any license found in the component, declared or observed.
- Confirmed
- Confirmed just indicates that the license(s) found are indeed correct, and will be included in any count of license issues.
Note
You can edit multiple license statuses via the list, simply select a checkbox next to each license you want to change the status of, and then click the edit button. The remaining information will be the same. Though, you won’t be able to edit the actual license.
- License(s)
- The License(s) drop down only displays given that a status of selected or confirmed has been chosen. Given that it will present either a list of all licenses (if override is chosen) or only the declared and observed licenses (if selected is chosen). The license that is chosen will be displayed in the Overridden field in the Component Info section of the CIP.
- Comment
-
A comment is not required, but is a good element to include whenever you are making changes to the License Status. This is because it provides a way to understand, as well as audit, the decisions made to change a license status. This comment will be included with the record in the Audit Log section of the CIP.
Once you have made all your selections, and entered any necessary comments, click the Update button to save the License Status change.
So, we covered quite a bit there, and we didn’t even get into explaining the differences between licenses. Though, that’s something better afforded by your own legal council, or at least reviewing a vast amount of resources on the web. For this section here’s what you should have learned:
- Accessing the License Analysis tab.
- Reviewing license threat.
- Changing the status of a license issue.
- Overriding or selecting a license.